Step 1: Make the Buttery Crust
In a medium bowl, combine the graham cracker crumbs, melted butter, and sugar. Mix until the texture resembles damp sand.
Press the mixture firmly into the bottom and slightly up the sides of a 9-inch pie plate. Use the bottom of a glass or measuring cup to press it down evenly.
Place in the refrigerator while preparing the filling.
Step 2: Prepare the Creamy Filling
In a large bowl, beat the softened cream cheese, powdered sugar, and vanilla extract with an electric mixer until smooth and fluffy. Make sure there are no lumps.
In a separate chilled bowl, whip the heavy cream until soft peaks form. This step helps create that light, airy texture.
Gently fold the whipped cream into the cream cheese mixture until fully combined. Be careful not to overmix — you want to keep it light and fluffy.
Step 3: Assemble and Chill
Spread the cheesecake filling evenly into the prepared crust. Smooth the top with a spatula.
Refrigerate for at least 2–3 hours, or until firm and fully set. For best results, chill overnight.
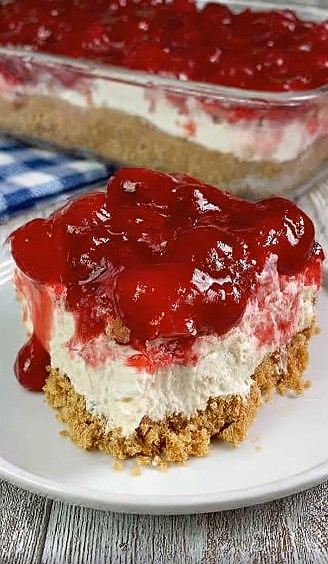
Step 4: Add the Cherry Topping
Once the cheesecake is set, spoon the cherry pie filling evenly over the top.
Slice, serve, and enjoy!
Pro Tips for Perfect Results
-
Make sure the cream cheese is fully softened before mixing to avoid lumps.
-
Chill your mixing bowl before whipping the cream for better volume.
-
For clean slices, dip your knife in warm water and wipe it between cuts.
-
Let the cheesecake chill longer if you want firmer slices.
Flavor Variations
Want to switch things up?
-
🍓 Strawberry topping
-
🫐 Blueberry compote
-
🍫 Chocolate ganache drizzle
-
🥭 Mango puree
-
🍋 Lemon zest in the filling for a fresh twist
This recipe is incredibly versatile.
The Final Bite
This No-Bake Cherry Cheesecake is everything a dessert should be:
Creamy.
Sweet.
Light.
Simple.
It’s the kind of recipe you’ll come back to again and again — because sometimes, the easiest desserts are the ones everyone remembers most.